Loopback 3.0- Create datasource and model for Cassandra
Pre-Installed:-
Loopback 3.0 and cassandra
Step 1: Creating a Keyspace using Cqlsh
cqlsh.> CREATE KEYSPACE test
WITH replication = {'class':'SimpleStrategy', 'replication_factor' : 3};
cqlsh> DESCRIBE keyspaces;

test system system_traces
Step 2: Creating a table using Cqlsh
cqlsh> USE test;

cqlsh:test>; CREATE TABLE pullcassandra(
   id text PRIMARY KEY
   emp_id text,
   emp_name text,
   emp_city text,
   emp_sal text,
   emp_phone text,
   );
"id" - for store the object key which is generated by loopback
Step 3: Creating a datasouce
In your application root directory, enter this command to install the connector:
npm install loopback-connector-cassandra --save$ lb datasource
? Enter the data-source name: mycass
? Select the connector for mycass: Cassandra (supported by StrongLoop)
Connector-specific configuration:
? host: localhost
? port: 9042
? user:
? password:
? database: test
? connectTimeout(ms): 30000
? readTimeout(ms): 30000
? Install loopback-connector-cassandra@^1.0.0 Yes
loopback-connector-cassandra@1.0.0 node_modules/loopback-connector-cassandra
...
The entry in the application’s
/server/datasources.json will look like this:"mycass": {
"host": "localhost",
"port": 9042,
"database": "test",
"password": "",
"name": "mycass",
"user": "",
"connectTimeout": 30000,
"readTimeout": 30000,
"connector": "cassandra"
}
Step 4: Creating a model
$ lb model
? Enter the model name: pullcassandra
? Select the datasource to attach pullcassandra to: cassandra (cassandra)
? Select model's base class PersistedModel
? Expose pullcassandra via the REST API? No
? Common model or server only? common
Let's add some pullcassandra properties now.

Enter an empty property name when done.
? Property name: emp_id
   invoke   loopback:property
? Property type: string
? Required? Yes
? Default value[leave blank for none]:

Let's add another pullcassandra property.
Enter an empty property name when done.
? Property name: emp_city
   invoke   loopback:property
? Property type: string
? Required? Yes
? Default value[leave blank for none]:

Let's add another pullcassandra property.
Enter an empty property name when done.
? Property name: emp_name
   invoke   loopback:property
? Property type: string
? Required? Yes
? Default value[leave blank for none]:

Let's add another pullcassandra property.
Enter an empty property name when done.
? Property name: emp_phone
   invoke   loopback:property
? Property type: string
? Required? Yes
? Default value[leave blank for none]:

Let's add another pullcassandra property.
Enter an empty property name when done.
? Property name: emp_sal
   invoke   loopback:property
? Property type: string
? Required? Yes
? Default value[leave blank for none]:

Let's add another pullcassandra property.
Enter an empty property name when done.
? Property name:
The entry in the application’s
/models/pullcassandra.json will look like this:
{
"name": "pullcassandra",
"base": "PersistedModel",
"idInjection": true,
"options": {
"validateUpsert": true
},
"properties": {
"emp_id": {
"type": "string",
"required": true
},
"emp_city": {
"type": "string",
"required": true
},
"emp_name": {
"type": "string",
"required": true
},
"emp_phone": {
"type": "string",
"required": true
},
"emp_sal": {
"type": "string",
"required": true
}
},
"validations": [],
"relations": {},
"acls": [],
"methods": {}
}
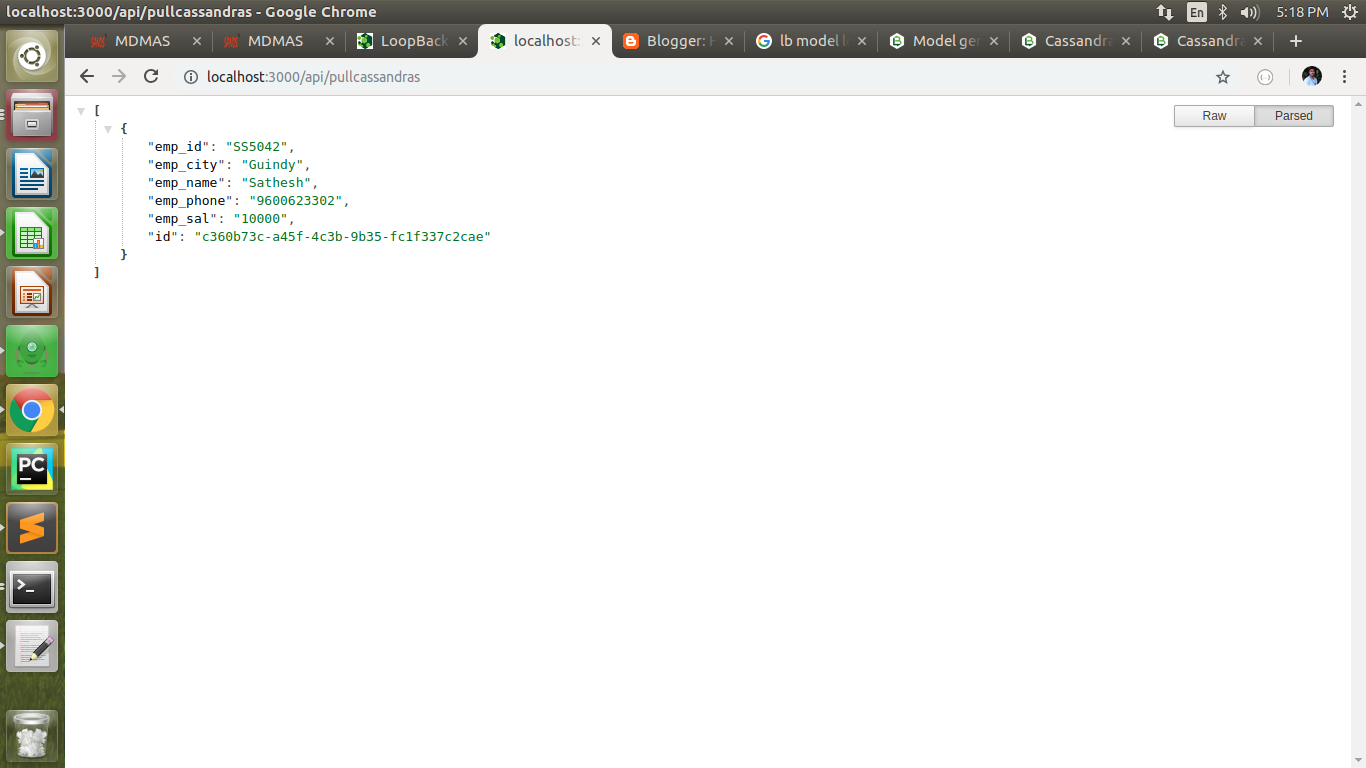
Step 5: Start Your Application
$ node .
Output:-
Use https://localhost:3000/explorer to check in client

Thats it!.......... Thank you..
Comments
Post a Comment